iPhoneの計算機アプリをつくる-2
前回の記事では,ボタンが1つしかないアプリを作りました
processing-p5.hateblo.jp
今回は0~9の数字を打てるように,10個のボタンを用意します
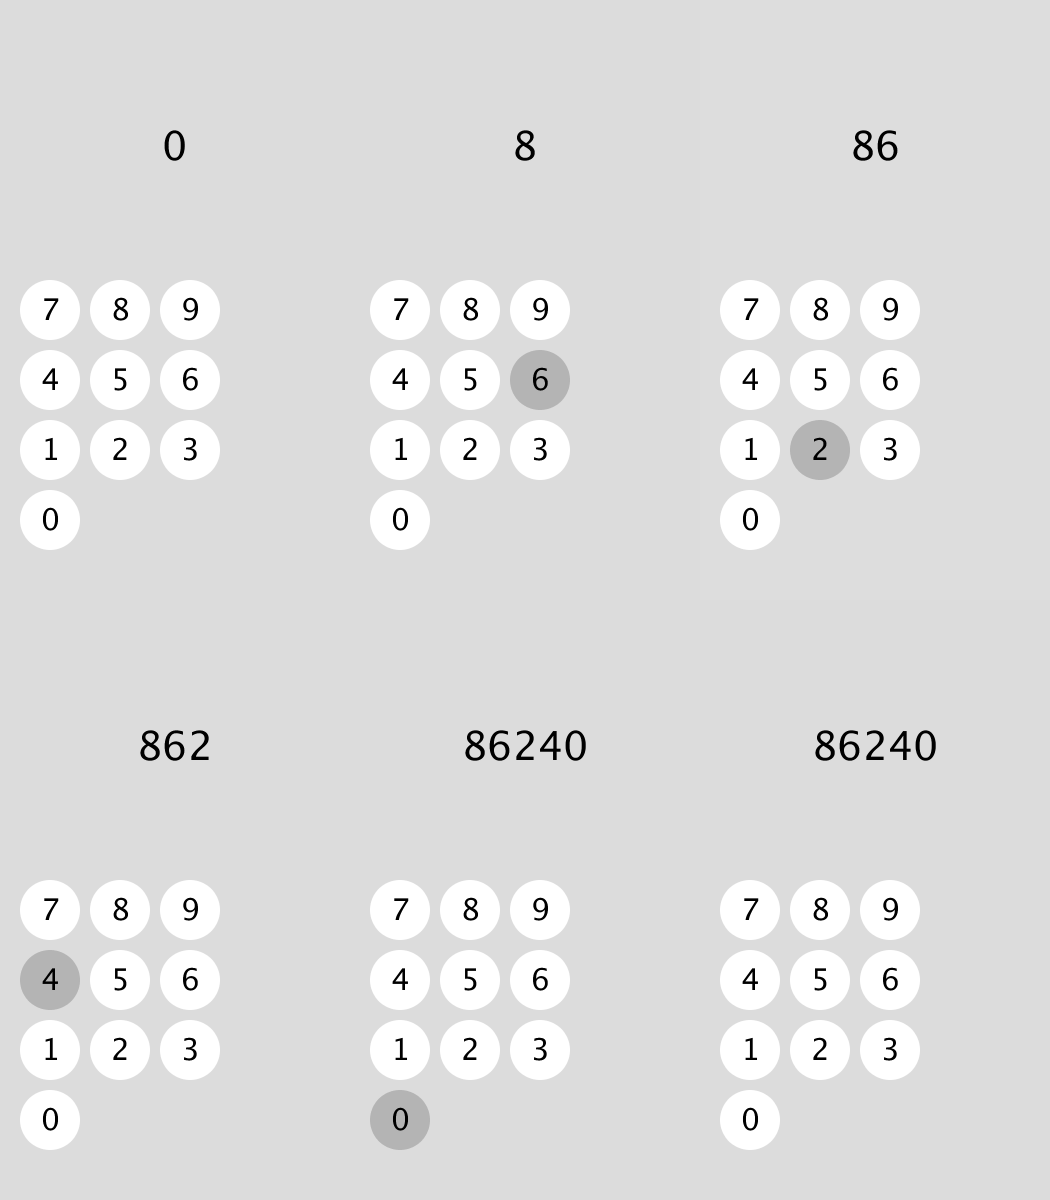
今回つくるアプリは下のようになります

まだ四則演算の計算はできませんが,数字を打ち込む機能の大枠は完成しました
コードは以下のようになります
String s = "0";
Button[] buttons = new Button[10]; // ボタン型配列
int[] co_x = {50, 120, 190}; // ボタンのx座標
int[] co_y = {310, 380, 450}; // ボタンのy座標

void setup(){
  size(350, 600);
  background(220);
  textAlign(CENTER, BASELINE);
  buttons[0] = new Button(0, 50, 520); // 0のボタンのインスタンス
  // 1~9のボタンのインスタンス
  for(int i=1; i<10; i++){
    buttons[i] = new Button(i, co_x[(i-1)%3], co_y[2-(i-1)/3]);
  }
}

void draw(){
  background(220);
  fill(0);
  textSize(40);
  text(s, width/2, 160);

  for(int i=0; i<10; i++){
    buttons[i].display();
  }
}
void mouseClicked(){
  for(int i=0; i<10; i++){
    if(dist(mouseX, mouseY, buttons[i].bx, buttons[i].by)<30){
      if(s.charAt(0) == '0') s = Integer.toString(buttons[i].num);
      else s += buttons[i].num;
    }
  }
}


class Button{
  int col = 255; // ボタンの色
  int bx; // ボタンのx座標
  int by; // ボタンのy座標
  int br = 30; // ボタンの半径
  int num;

  // constructor
  Button(int _num, int _bx, int _by){
    bx = _bx;
    by = _by;
    num = _num;
  }

  // function
  void display(){
    if(dist(mouseX, mouseY, bx, by)<30) col=180;
    else                                col=255;
    fill(col);
    noStroke();
    circle(bx, by, 2*br);
    fill(0);
    textSize(30);
    text(num, bx, by+10);
  }
}
ボタンが全部で10個あるので,まずはButtonクラスのオブジェクトを格納する配列を用意しています
Button[] buttons = new Button[10]; // ボタン型オブジェクトを格納する配列
また各ボタンを画面上に配置するにあたって,x座標とy座標をそれぞれ用意し,配列に格納します
int[] co_x = {50, 120, 190}; // ボタンのx座標
int[] co_y = {310, 380, 450}; // ボタンのy座標
これらの座標を用いてButtonクラスのインスタンスを作成することで,
画面上にボタンを綺麗に配置することができます
  // 1~9のボタンのインスタンス
  for(int i=1; i<10; i++){
    buttons[i] = new Button(i, co_x[(i-1)%3], co_y[2-(i-1)/3]);
  }
なお, Buttonクラスのインスタンスを作成する際には,コンストラクタに引数として
ボタンの数字, x座標の値, y座標の値を渡せるようにしておきます
class Button{
  int col = 255; // ボタンの色
  int bx; // ボタンのx座標
  int by; // ボタンのy座標
  int br = 30; // ボタンの半径
  int num;

  // コンストラクタ
  Button(int _num, int _bx, int _by){
    bx = _bx;
    by = _by;
    num = _num;
  }
最後に,数字を打ち込む際に「00」や「01」などのように,数字の頭に0が表示されてほしくないので
mouseClicked()関数の中身を次のように記述しています
void mouseClicked(){
  for(int i=0; i<10; i++){
    if(dist(mouseX, mouseY, buttons[i].bx, buttons[i].by)<30){
      if(s.charAt(0) == '0') s = Integer.toString(buttons[i].num); // 数字の頭が0の場合の処理
      else s += buttons[i].num;
    }
  }
}
コード全体を眺めてみると,美しくない書き方や重複などが所々見られますね
これらをちょこちょこ直しつつ,次回では四則演算機能を追加してみたいと思います